How to Make Fall-Off-the-Bone Ribs with Apple Butter Glaze
Apple butter glaze transforms ordinary pork ribs into sweet, sticky, caramelized perfection. Learn the complete method for tender ribs with a homemade apple-forward finish.
Apple butter glazed pork ribs are having a moment, and for good reason. The combination of tender, smoky ribs with a sweet-tart apple butter glaze delivers everything you want in barbecue: caramelization, depth, and that perfect balance between savory and sweet. Whether you're firing up the grill for a weekend cookout or experimenting with new flavor profiles, this technique turns a classic rack of ribs into something memorable.
This guide walks you through the complete process—from selecting the right cut of ribs to building a balanced apple butter glaze that caramelizes beautifully without burning. We'll cover dry rub options, cooking methods for both grill and oven, and the exact timing for applying your glaze to get that signature sticky, lacquered finish.
Why Apple Butter Works Perfectly on Pork Ribs
Apple butter isn't just applesauce with a fancy name. It's a concentrated, slow-cooked spread made by reducing apples with spices like cinnamon, cloves, and allspice until the natural sugars caramelize and the texture becomes thick and spreadable. That concentrated sweetness and subtle spice profile make it an ideal base for rib glazes.
Pork and apples have been culinary partners for centuries, and the science backs up the pairing. The acidity in apples cuts through pork's richness, while the natural fruit sugars enhance browning and create a mahogany crust. Apple butter brings all of this in a shelf-stable, easy-to-use form that adheres beautifully to meat during the final stages of cooking.
Unlike thin sauces that drip off or burn quickly, apple butter's thick consistency clings to the ribs. The sugars caramelize gradually, building layers of flavor with each application. The warm spices already in most apple butter recipes—cinnamon, nutmeg, cloves—complement traditional rib rubs without overwhelming the smoke and meat flavor you worked so hard to develop.
Choosing Your Ribs: Baby Back vs. Spare Ribs
Before you think about glaze, you need the right canvas. The two most common pork rib cuts are baby backs and St. Louis-style spare ribs, and each has distinct characteristics that affect cooking time and final texture.
Baby back ribs come from the loin section, closer to the backbone. They're shorter, curved, and more tender with less fat. They typically weigh 1.5 to 2 pounds per rack and cook faster—usually 4 to 5 hours at low temperatures or 1.5 to 2 hours at higher heat. Baby backs are leaner, which means they can dry out if overcooked, but they also absorb glaze beautifully due to their tender texture.
Spare ribs come from the belly side, below the baby backs. They're larger, flatter, and meatier with more fat marbling and connective tissue. A full rack can weigh 3 pounds or more. St. Louis-style spare ribs are spare ribs with the rib tips and cartilage trimmed away for a uniform rectangular shape. Spare ribs take longer to become tender—typically 5 to 6 hours low and slow, or 2.5 to 3 hours at moderate heat—but the extra fat keeps them moist and adds flavor.
For apple butter glaze, both cuts work beautifully. Baby backs give you a quicker cook and a more refined presentation, while spare ribs offer more meat and a richer, fattier bite that stands up well to sweet glazes.
Building Your Rib Rub: Balancing Sweet and Savory
Because your glaze will bring sweetness and fruit-forward flavor, your dry rub should focus on savory, earthy, and slightly spicy notes to create balance. The rub also forms the bark—the flavorful crust that develops during cooking—and provides the foundation for your glaze to adhere to.
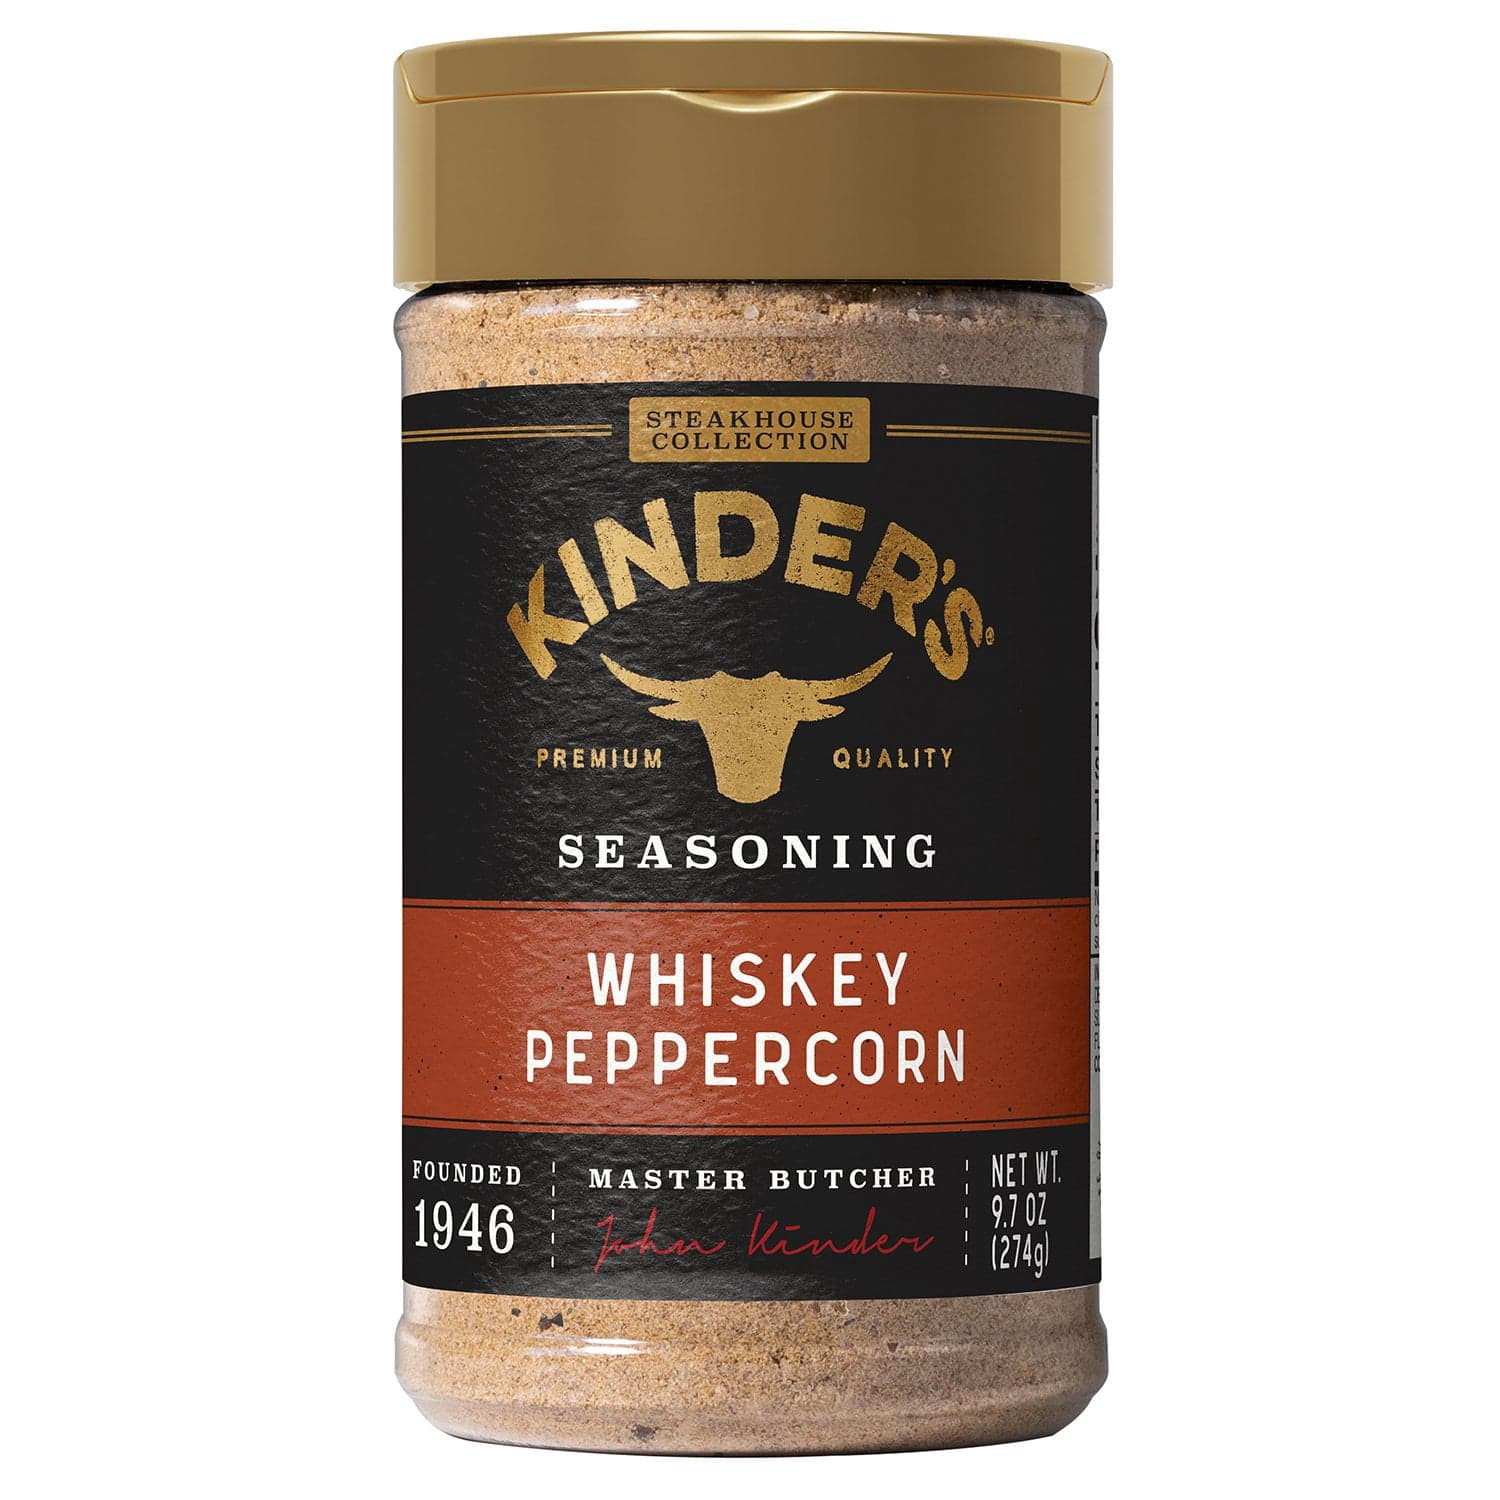
A simple but effective apple butter rib rub might include brown sugar (just a touch), smoked paprika, garlic powder, onion powder, black pepper, cayenne, and salt. The brown sugar helps with caramelization early in the cook, while the spices build complexity. If you want a more robust, peppery profile, Kinder's Whiskey Peppercorn Seasoning brings bold black pepper, garlic, and a hint of whiskey barrel smoke that pairs beautifully with the sweetness of apple butter.
For a more classic steakhouse-meets-BBQ flavor, Kinder's Buttery Steakhouse Seasoning delivers garlic, butter notes, and a savory backbone that complements pork without competing with the apple glaze. The buttery quality in the rub also enhances the richness of the ribs themselves.
Apply your rub generously to both sides of the ribs after removing the membrane from the bone side. Let the rubbed ribs sit at room temperature for 30 to 45 minutes before cooking, or refrigerate them uncovered for up to 24 hours to let the flavors penetrate and the surface dry out slightly for better bark formation.
The Low-and-Slow Method: Smoking or Grilling Ribs
Low-and-slow cooking is the gold standard for ribs. The goal is to break down collagen and connective tissue into gelatin, which makes the meat tender and gives ribs that satisfying pull-off-the-bone texture. This requires time, gentle heat, and often a bit of smoke.
Set up your grill or smoker for indirect heat at 225 to 250 degrees Fahrenheit. If you're using a charcoal grill, bank coals to one side and place ribs on the opposite side. For a gas grill, light only one or two burners and place ribs over the unlit section. Add wood chunks or chips—apple wood is a natural match for apple butter glaze, but hickory, cherry, or oak all work well.
Place the ribs bone-side down on the grate. Close the lid and maintain steady temperature. For baby backs, plan on 4 to 5 hours total. For spare ribs, plan on 5 to 6 hours. You're looking for an internal temperature of around 195 to 203 degrees Fahrenheit in the thickest part of the meat, and for the meat to pull back from the bone tips by about a quarter inch.
Many pitmasters use the 3-2-1 method for spare ribs (3 hours unwrapped, 2 hours wrapped in foil with a bit of liquid, 1 hour unwrapped with sauce or glaze) or the 2-2-1 method for baby backs. Wrapping in foil during the middle stage—often called the Texas crutch—steams the ribs and speeds up the rendering of fat and collagen. This step is optional, but it helps achieve fall-off-the-bone tenderness.
Oven-Baked Ribs: A Reliable Indoor Alternative
Not everyone has access to a grill or smoker, and weather doesn't always cooperate. The good news is you can achieve tender, flavorful ribs in your oven with just a few adjustments.
Preheat your oven to 275 degrees Fahrenheit. Apply your dry rub as described above, then wrap each rack tightly in two layers of heavy-duty aluminum foil. Place the wrapped ribs on a baking sheet and bake for 2.5 to 3 hours for baby backs, or 3 to 3.5 hours for spare ribs.
The foil traps moisture and creates a steaming environment that breaks down connective tissue. You won't get the smoke ring or deep bark of a grill, but you will get tender, juicy meat. After the initial baking time, carefully unwrap the ribs (watch for hot steam), drain any accumulated liquid, and return them to the oven uncovered.
Increase the oven temperature to 375 or 400 degrees Fahrenheit. This is when you'll apply your apple butter glaze. Brush a generous layer on both sides of the ribs, return them to the oven, and bake for 10 minutes. Apply a second coat of glaze, bake another 10 minutes, and repeat once more. This three-stage glazing builds layers of caramelized sweetness and creates that glossy, sticky finish.
For even better caramelization, finish the ribs under the broiler for 2 to 3 minutes, watching closely to prevent burning. The high heat will bubble and char the glaze in spots, adding complexity and visual appeal.
Making Your Apple Butter Glaze from Scratch
Store-bought apple butter is convenient and works beautifully, but making a custom glaze lets you control sweetness, spice, and consistency. A basic apple butter BBQ glaze starts with apple butter as the base, then adds complementary flavors to create a sauce that's balanced and complex.
Here's a simple formula:
- 1 cup apple butter
- 1/4 cup apple cider vinegar (for tanginess and to cut sweetness)
- 2 tablespoons brown sugar or maple syrup (optional, if your apple butter isn't sweet enough)
- 1 tablespoon Dijon mustard (adds depth and slight heat)
- 1 teaspoon smoked paprika
- 1/2 teaspoon garlic powder
- 1/2 teaspoon onion powder
- 1/4 teaspoon cayenne or black pepper (adjust to taste)
- Salt to taste
Whisk all ingredients together in a small saucepan over medium-low heat. Simmer gently for 10 to 15 minutes, stirring occasionally, until the glaze thickens slightly and the flavors meld. Taste and adjust: add more vinegar if it's too sweet, more brown sugar if it's too tart, or a pinch of cinnamon if you want more warmth.
The glaze should be thick enough to coat the back of a spoon but still brushable. If it's too thick, thin it with a tablespoon of apple juice or water. If it's too thin, simmer it a bit longer to reduce.
When and How to Apply Your Glaze
Timing is everything when it comes to glazing ribs. Apply glaze too early, and the sugars will burn before the meat is done. Apply it too late, and the glaze won't have time to caramelize and develop flavor.
The sweet spot is during the final 30 to 45 minutes of cooking. At this point, the ribs are nearly tender, the bark has set, and the surface is ready to accept the glaze without steaming it off.
Use a silicone basting brush to apply a thin, even layer of glaze to both sides of the ribs. Return them to the heat for 10 to 15 minutes, then apply a second coat. Repeat this process two or three times, building up layers of glaze that caramelize progressively. Each layer should have time to set and slightly char before the next goes on.
If you're finishing on the grill, you can move the ribs directly over the heat for the last few minutes to get a bit of char and caramelization, but watch closely—the sugars in apple butter can go from perfect to burnt quickly.
Resting, Cutting, and Serving Your Ribs
Once your ribs are glossy, caramelized, and tender, resist the urge to dive in immediately. Let them rest for 10 minutes loosely tented with foil. This allows the juices to redistribute and makes cutting cleaner.
To cut ribs properly, place them bone-side up on a cutting board. Use a sharp knife and cut between each bone, working your way down the rack. If the ribs are properly cooked, the knife should slide through with minimal resistance, and the meat should pull cleanly away from the bone with a slight tug—not fall off completely, which can indicate overcooking.
Serve the ribs with extra apple butter glaze on the side for dipping. Classic sides like coleslaw, cornbread, baked beans, or mac and cheese balance the sweetness of the glaze with creaminess and acidity. For a lighter option, consider a crisp apple and fennel slaw or roasted Brussels sprouts with bacon.
Flavor Variations and Creative Twists
Once you've mastered the basic apple butter glaze technique, there are endless ways to riff on the flavor profile.
Bourbon Apple Butter Glaze: Add 2 tablespoons of bourbon to your glaze along with a tablespoon of molasses for a deeper, more complex sweetness. The alcohol cooks off, leaving behind oaky, vanilla notes that pair beautifully with pork. If you want to echo these flavors in your rub, Kinder's Gold Label Bourbon Apple BBQ Sauce can be used as a finishing glaze or mixed into your homemade apple butter base for extra depth.
Spicy Apple Chipotle Glaze: Stir in a tablespoon of adobo sauce from canned chipotles, or add a teaspoon of chipotle powder to your glaze base. The smokiness of chipotle complements both the apple and the pork, while the heat cuts through the sweetness.
Maple Apple Glaze: Replace half the apple butter with pure maple syrup and add a pinch of cinnamon and nutmeg. This creates a more autumn-forward flavor that's perfect for fall cookouts.
Asian-Inspired Apple Glaze: Mix apple butter with soy sauce, rice vinegar, ginger, and a touch of sesame oil for a fusion glaze that bridges American BBQ and Asian flavors. This works especially well if you use a savory rub with garlic and five-spice powder.
Troubleshooting Common Rib Problems
Ribs are tough: They need more time. Low-and-slow cooking is about breaking down collagen, and that takes hours. If your ribs are chewy, wrap them in foil with a splash of apple juice or beer and return them to the heat for another hour.
Ribs are falling apart: You've overcooked them. While "fall-off-the-bone" sounds appealing, competition-style ribs should have a slight pull. Next time, reduce cooking time by 30 minutes or check for doneness earlier.
Glaze is burning: Your heat is too high, or you applied glaze too early. Keep the temperature at or below 300 degrees Fahrenheit during glazing, and don't apply glaze until the last 30 to 45 minutes.
Glaze isn't sticking: The ribs may be too wet. Pat them dry with paper towels before applying glaze, and make sure your glaze is thick enough. Simmer it longer to reduce if needed.
No bark or crust: The ribs may have been wrapped too long, or the rub didn't have enough sugar. A light dusting of rub after unwrapping and a higher finishing temperature can help develop bark even late in the cook.
Pairing Your Ribs with the Right Sides
Sweet, sticky ribs beg for sides that provide contrast and balance. Here are a few tried-and-true pairings:
- Tangy coleslaw: Vinegar-based slaw cuts through the richness and sweetness, providing crunch and acidity.
- Cornbread: Slightly sweet, slightly crumbly, and perfect for soaking up glaze and juices.
- Baked beans: Another sweet element, but the savory pork and molasses flavors create a cohesive BBQ plate.
- Grilled vegetables: Charred zucchini, bell peppers, and onions add smokiness and freshness.
- Mac and cheese: Creamy, comforting, and a crowd favorite that balances the bold flavors of glazed ribs.
- Pickles and pickled vegetables: Dill pickles, pickled onions, or bread-and-butter pickles add brine and snap that refresh the palate between bites.
Storing and Reheating Leftover Ribs
If you're lucky enough to have leftovers, store ribs properly to maintain their texture and flavor. Let them cool to room temperature, then wrap tightly in plastic wrap or foil and refrigerate for up to four days. For longer storage, wrap in foil and then place in a freezer bag; ribs will keep frozen for up to three months.
To reheat, avoid the microwave, which will make the meat rubbery. Instead, preheat your oven to 250 degrees Fahrenheit, wrap the ribs in foil with a tablespoon of apple juice or water, and heat for 20 to 30 minutes until warmed through. For the last five minutes, unwrap the ribs, brush with fresh glaze, and increase the heat to 350 degrees to refresh the glaze.
You can also reheat ribs on the grill over indirect heat, which adds a bit of fresh smoke and char. Wrap in foil for the first 15 minutes, then unwrap, glaze, and finish over direct heat for a few minutes per side.
Why This Recipe Works for Weeknight Cooking
While traditional low-and-slow ribs are a weekend project, you can adapt this method for weeknight dinners with a few shortcuts. Use the oven method at 300 degrees Fahrenheit, which cuts total cooking time to about 2 to 2.5 hours. You can also use pre-seasoned or pre-rubbed ribs from your butcher to save prep time.
Another option is to cook ribs in a slow cooker. Rub the ribs, cut them into individual or two-bone sections, and layer them in the slow cooker. Cook on low for 6 to 7 hours or high for 3 to 4 hours. Transfer the ribs to a baking sheet, brush with apple butter glaze, and finish under the broiler for 5 to 10 minutes to caramelize.
Instant Pot or pressure cooker ribs are another fast-track option. Rub the ribs, cut them to fit, and pressure cook with a cup of apple juice for 25 to 30 minutes. Release pressure, transfer ribs to a baking sheet, glaze, and broil for a few minutes. You'll sacrifice some smoke and bark, but you'll have tender, glazed ribs on the table in under an hour.
Final Tips for Perfect Apple Butter Ribs Every Time
Great ribs come down to patience, attention to detail, and a willingness to adjust based on what you see, smell, and taste. Here are a few final tips to ensure success:
- Always remove the membrane from the bone side of the ribs. It prevents rub and smoke penetration and becomes chewy when cooked.
- Invest in a reliable meat thermometer. Guessing doneness leads to inconsistent results.
- Don't skip the resting period. It makes a measurable difference in juiciness and texture.
- Taste your glaze before applying. Adjust sweetness, acid, and salt to your preference.
- Keep a spray bottle of apple juice or cider handy to spritz the ribs every hour during cooking. This helps keep the surface moist and builds flavor.
- If you're new to ribs, start with baby backs. They're more forgiving and cook faster.
- Don't be afraid to experiment with different woods, rubs, and glaze variations. Ribs are versatile and reward creativity.
Ready to Fire Up Your Grill?
Apple butter glazed pork ribs are a celebration of classic barbecue technique and creative flavor pairing. The rich, caramelized sweetness of apple butter, the savory depth of a well-balanced rub, and the tender, smoky meat come together in a dish that's as impressive as it is approachable. Whether you're cooking for a backyard party or just treating yourself to a weekend project, this recipe delivers.
With the right seasonings, a little patience, and quality ingredients, you'll have ribs that rival any BBQ joint. Explore our full collection of premium rubs and sauces to take your rib game—and every other grilling project—to the next level. Your best rack of ribs is just one cook away.
Shop the products mentioned in this article
Free shipping on every order. No minimums, no gimmicks.